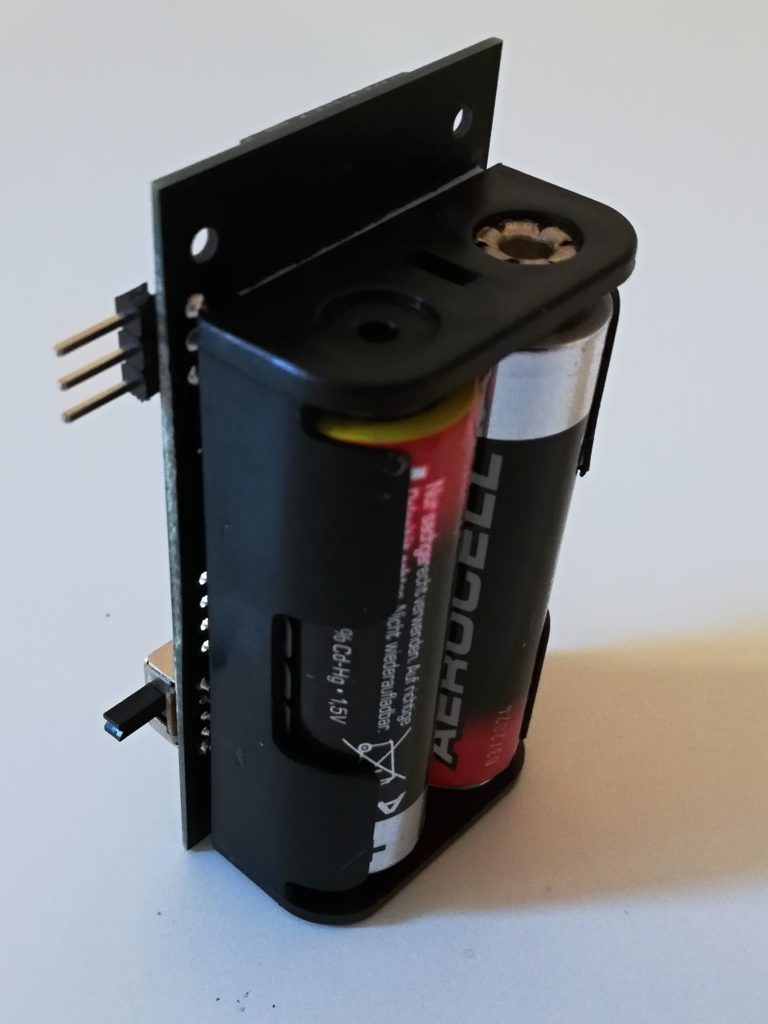
ESP8266 ultra low power thermometer
This is another project I originally build for a ground school here in the Czech Republic. But in the end, I liked it a lot, so I build a few of these modules for myself as well. It’s basically a small ESP8266-based board with a BME280/BMP280 sensor and these features:
- measures temperature, humidity, pressure (BME280) or just temperature and pressure (BMP280); however it also sends message ID and battery voltage
- powered by 2 AA cells, should last at least 2 years on single pair (see calculations below)
- transmits data regularly to Blynk/ThingSpeak/Azure
- cost should be below 5 USD/unit
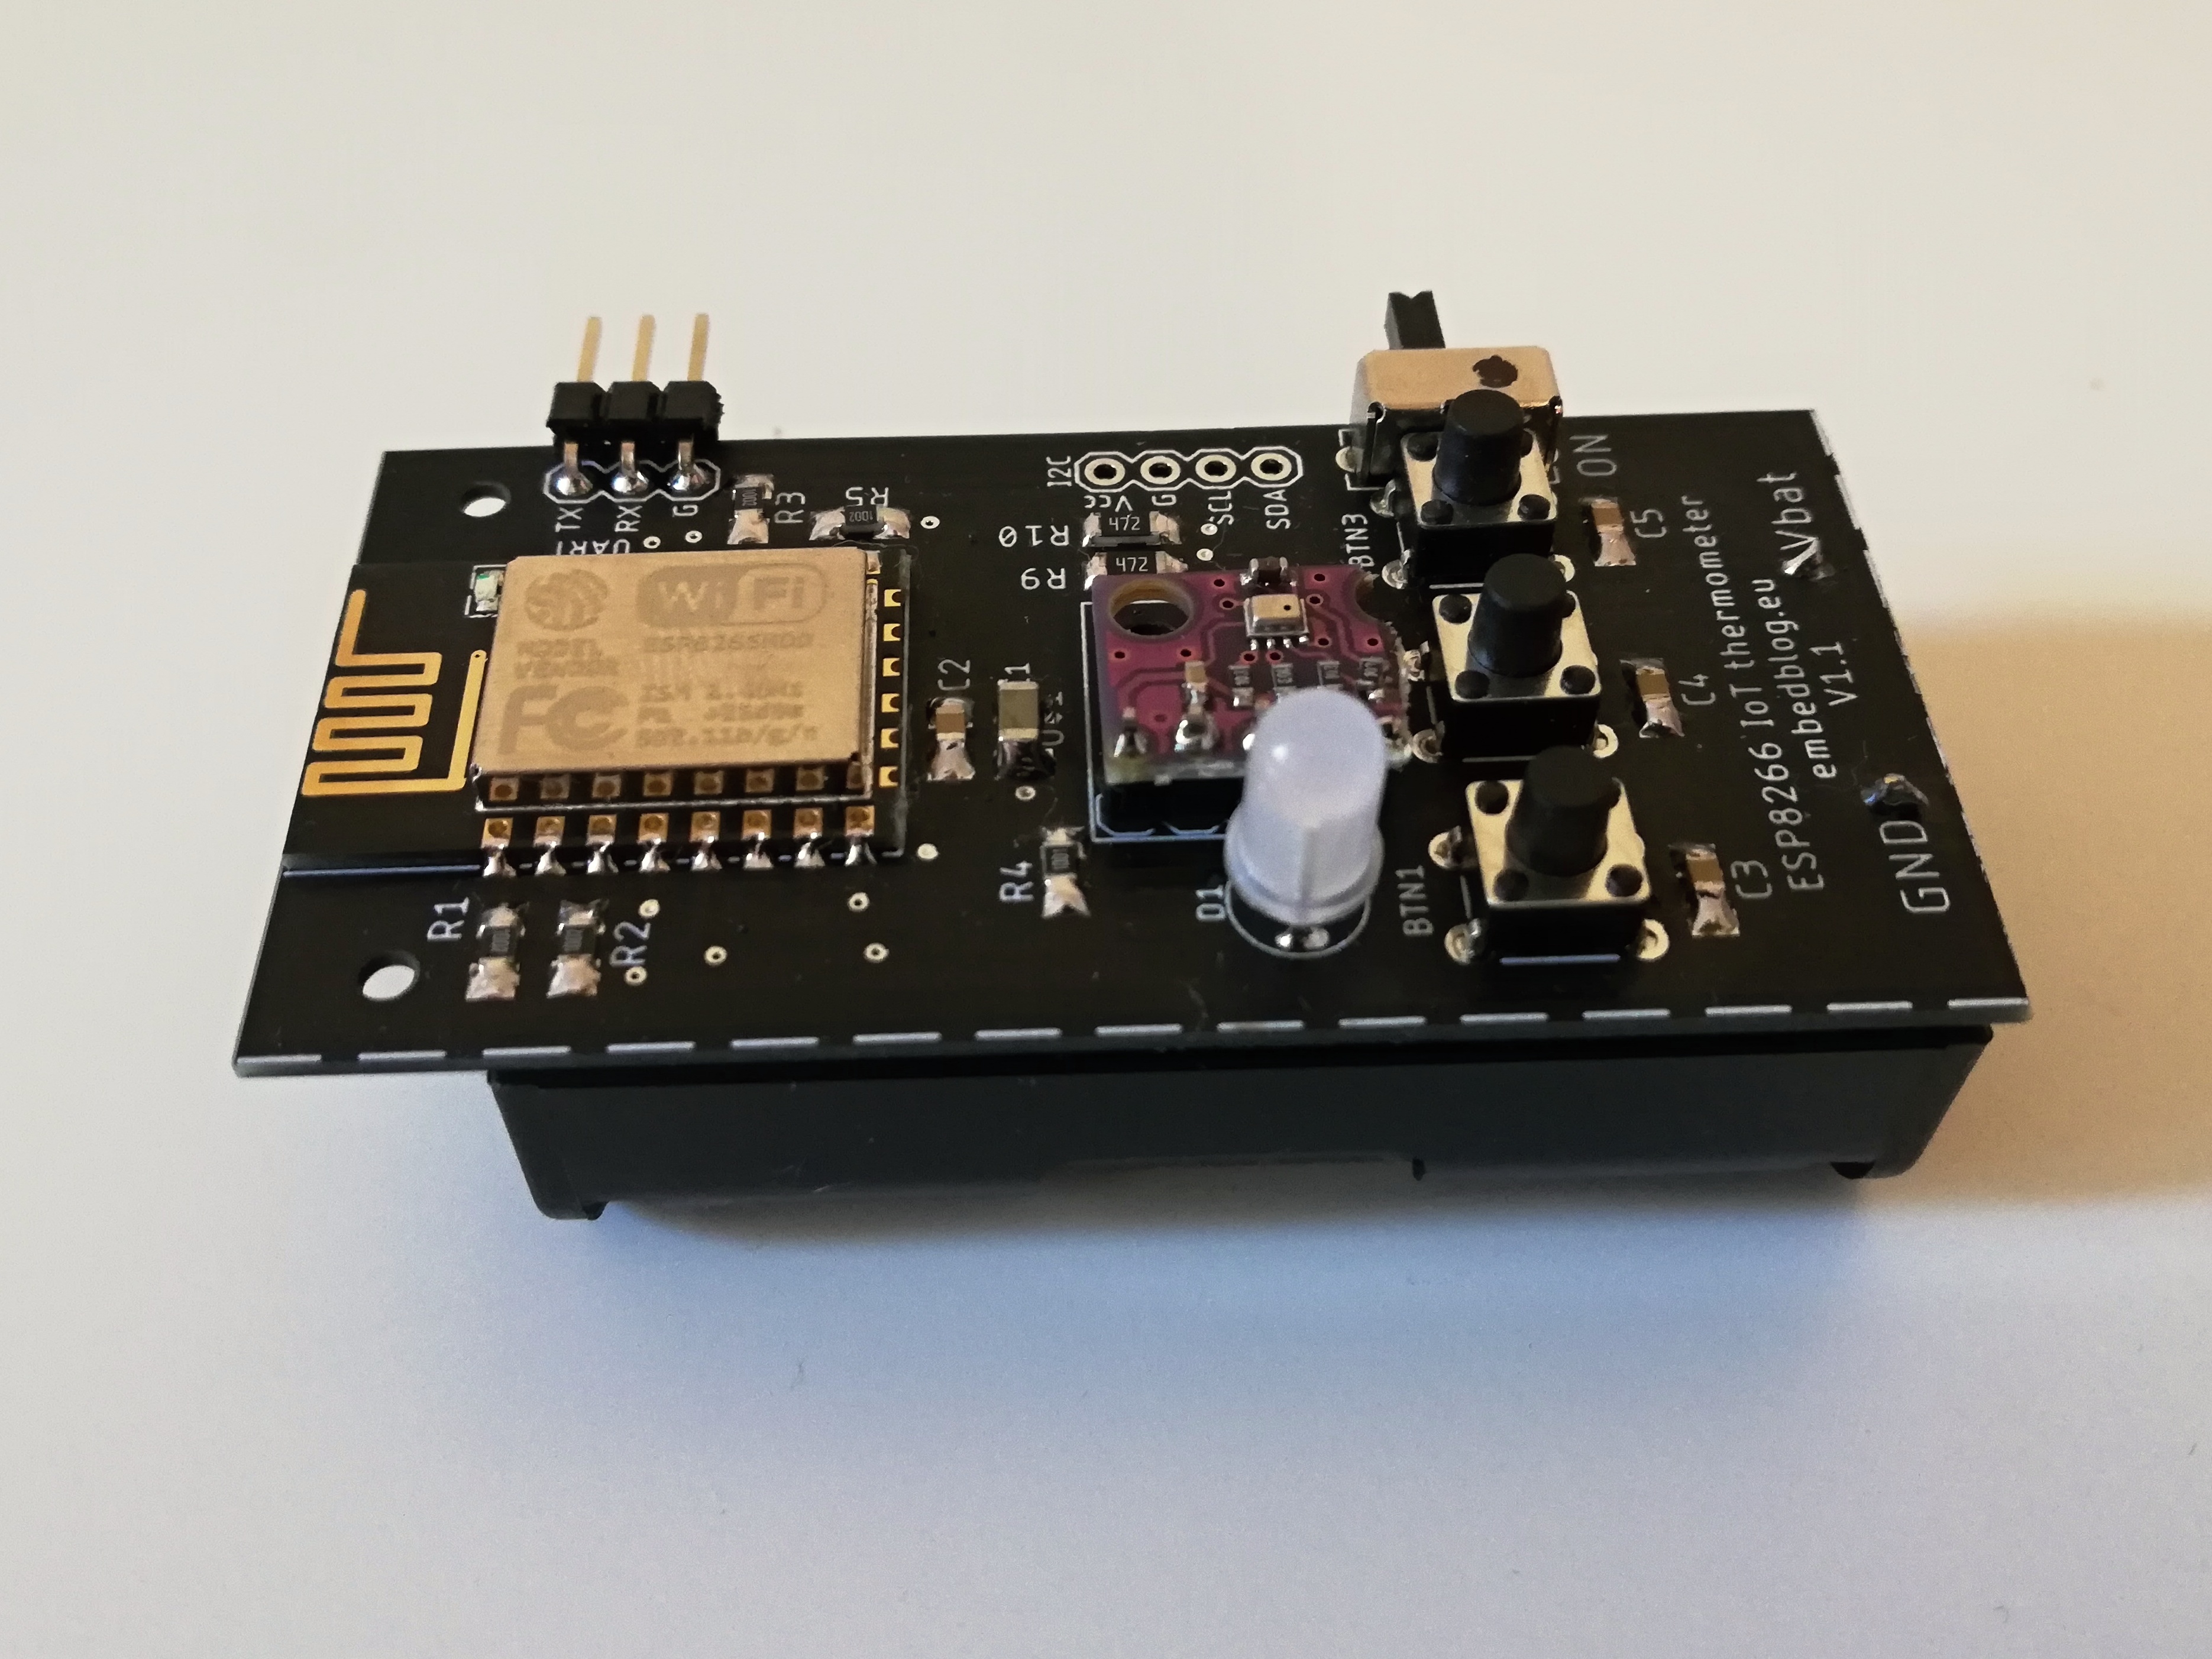
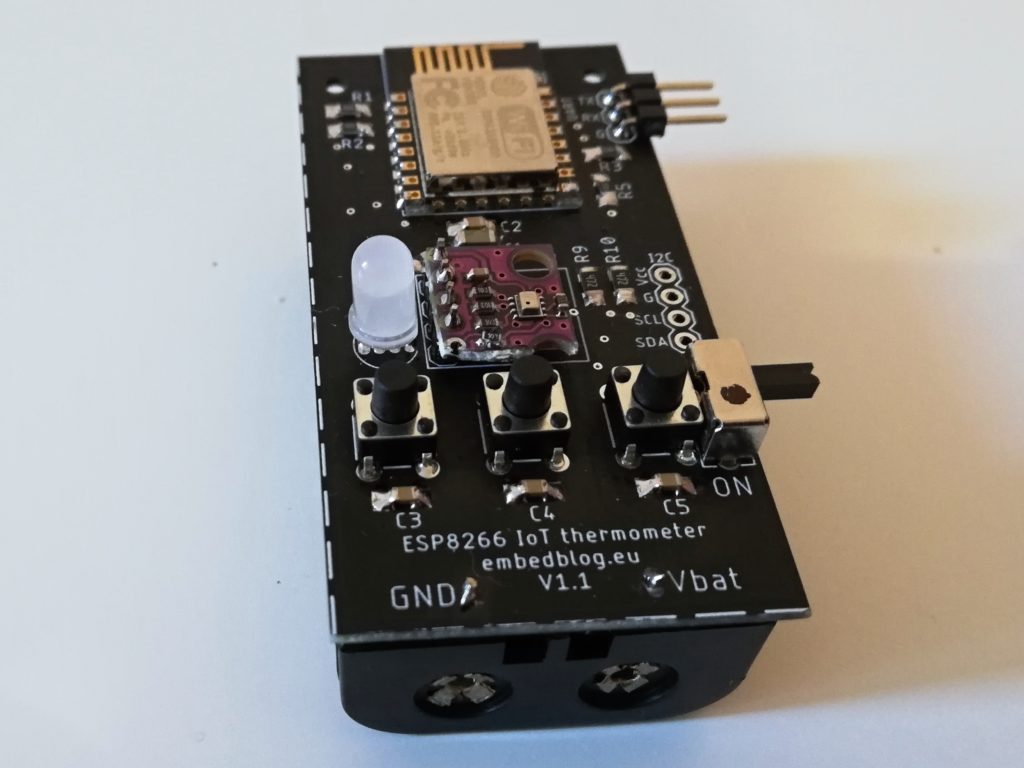
There is also an RGB LED (which blinks shortly, to let the user know that data have been transmitted), three buttons (reset, programming mode and unused), ON/OFF switch and an exposed I2C port, if you want to add some custom sensors/displays/etc. Otherwise the schematic is pretty straightforward with just some more resistors and capacitors:

Data visualization
One of the most important parts of any data acquisition system is how the data are displayed. I was considering three platforms for data storage and visualization:
- Microsoft Azure (Iot Hub and PowerBI)
- ThingSpeak
- Blynk
Azure is probably the most universal, but it is not free and it is very hard to setup. Also the Azure library for Arduino is not very well made I believe. ThingSpeak is great, but the visualization part is not that good if you do not have a MatLab license. Also I want to check out the data mostly on my smartphone, so I needed an Android app (and ideally I do not want to write the whole thing myself). So I decided to use Blynk. Here’s how the interface looks:
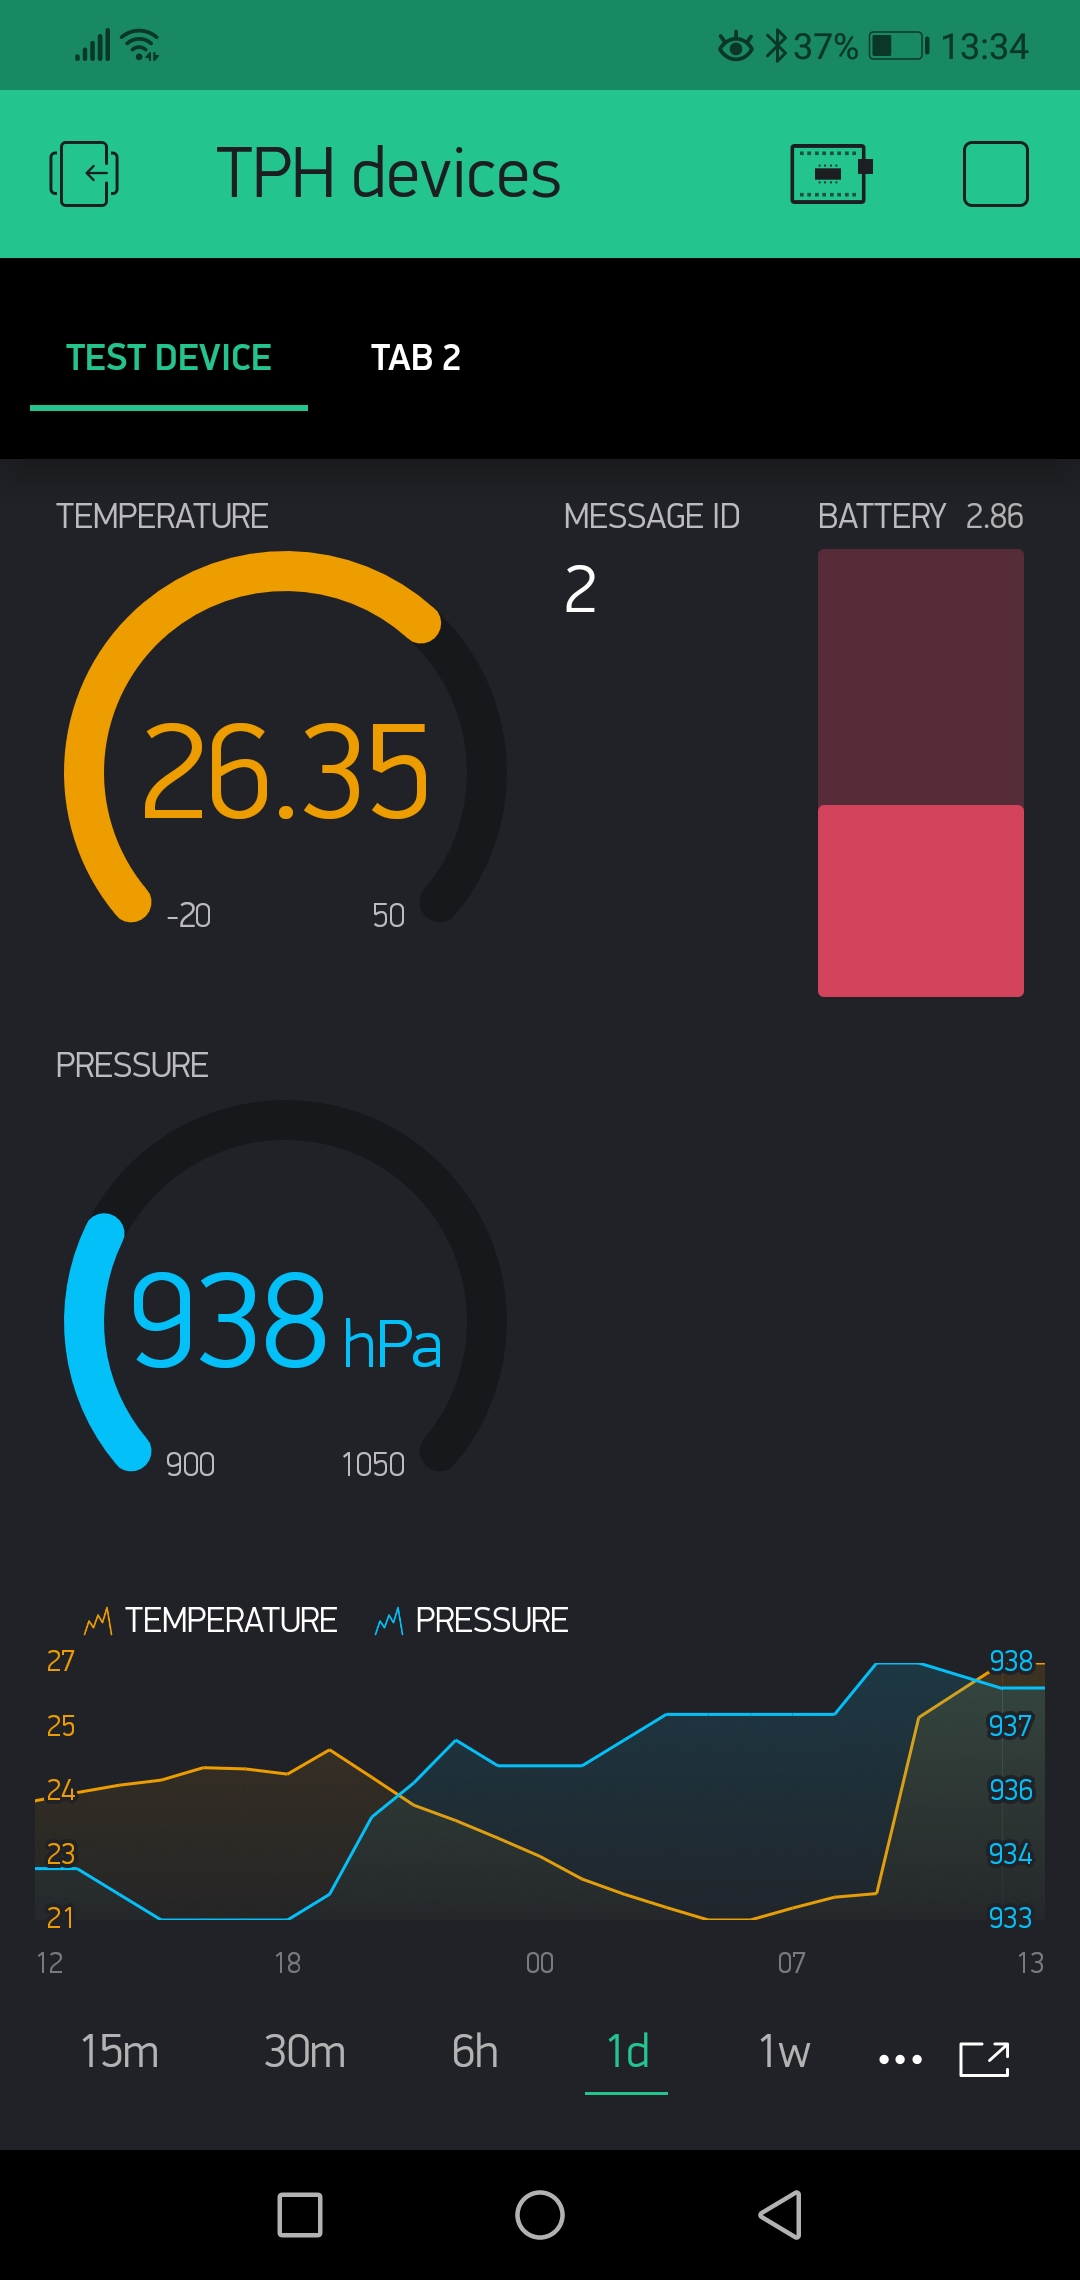
Blynk is free, to a certain extent – you’ll need ‘energy’ to purchase every widget, but the above screen was made for free from the amount you get when you register. If you want more screens such as this, you’ll need to do a single-time payment. However I consider the price to be fair for a well working data storage/visualization tool. And also Blynk is very easy to use, the only thing to note here is that all of the widgets get their data from virtual pins (see the Arduino code) and you need to set all of the widgets to push mode.
Current consumption
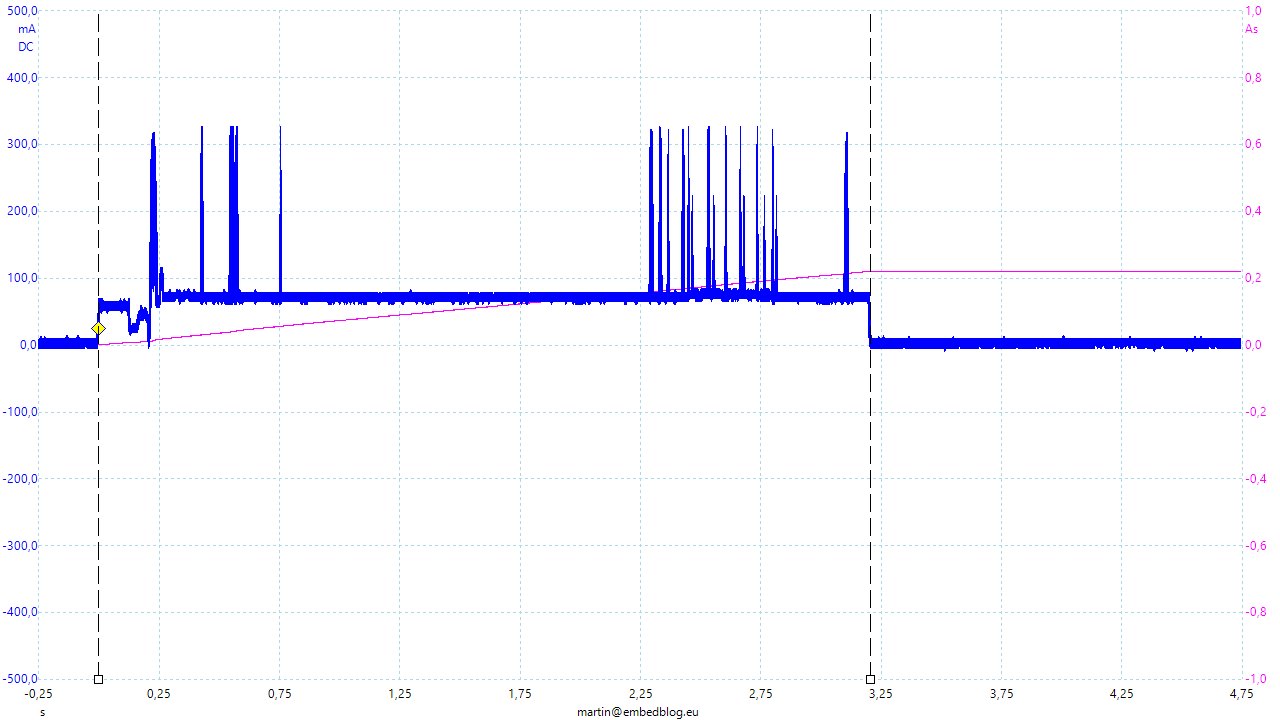
I wanted this board to last as long as possible on just a single pair of AA batteries. For most of the time, the device is in deep sleep mode, where it draws about 16.62 μA. Once it wakes up, it draws about 70 mA, so I had to write the program to execute as quickly as possible. With all the tricks I used, it usually takes only about 3.5 seconds to wake up, make a measurement, connect to WiFi, send data, receive acknowledge and go to deep sleep.
I am using relatively cheap AA alkaline cells from LIDL, which should have a capacity of about 2000 mAh with such a small load. This means that the device should last 980 days without needing to change batteries at one reading per hour. Of course this is a very rough estimate, not taking into account self-discharge etc., but I do believe it will last at least 2 years (thus fulfilling one of the requirements above). Here’s the waveform of current consumption during the measurement cycle:
BME280 vs BMP280
Just as a warning to other people, who might be interested in building one of these – there is a big difference between the BME280 and BMP280. They look exactly the same, but the P version cannot measure humidity. The problem is that when you are buying one of these sensors from Ebay, some sellers might advertise that even the P version can measure humidity. No, it cannot. And I heard that some sellers will even sell you BMP280, even though you ordered and paid for the more expensive BME280.
Code
The code is written in Arduino and it is not complicated. As of now, you need to hard-code all the parameters – SSID, password and so on – into the device. I might add a WiFi configuration portal later.
Conclusion
The device works very well, so I am pleased with result. I have build a few of them and so far I haven’t had any problems. For the outdoor ones I 3D printed a small case to protect them from the environment. A possible upgrade is to add a WiFi configuration portal to the code to enable users to change SSID etc. on the go without needing to reprogram the whole device.
All the source files are available on GitHub.
Additional reading
A series of articles about reducing the ESP8266 power consumption
Hi short question, where can I buy this module? I’m looking for that since a while.
Best regards
Stefan
Hi,
well, I made it myself, so as of now, you cannot buy it anywhere. How many modules would you want? I am thinking of making more of them for myself, so maybe I could build you couple as well…
Hi,
very interesting project. I also would be interested in buying this as a “ready to use” module. I’d need 3 of them, could you please consider mass-production? 😉
regards
Hi,
well, I will probably do a run this December or in January, so I’ll let you know once it’s done…
Regards, M.
Hello Martin.
Good looking device 👍.
If you are considering of producing this as a product for sale, or if you are willing to do some modification to the existing one, contact me on :
miboanko@gmail.com
Maybe we could do some cooperation😁
Hi,
It’s an excellent project. I would like to have the possibility to power it from the power supply through a regulator on it. For that, I have to modify PCB board. Is it possible to update PCB if I send you modifications?
THX in advance.
Best regards
Hi,
well, the source is on Github, unfortunately I do not have time to modify it to exactly suit your needs…