How to panelize PCBs in Eagle
These days, you can get custom PCBs made really cheap – a few dollars for a couple of 100×100 mm boards, complete with silkscreen, vias, everything. But even with these low prices you might want to have a couple of smaller boards produced on one, larger board.
Let’s clarify something first – I won’t be talking about panelization for mass production. What I’ll show you is how to merge a couple of Eagle projects together to produce one gerber file, which you can then upload to your favorite fab house, pay a couple of dollars for a single order, receive your PCBs and cut them out yourself. This should work with any fab house, I use JLCPCB, but it depends entirely on you. Also, this works only in Eagle, so if you use something else, you’ll need to figure it out yourself.
Now on paper, merging boards seems simple – let’s say you have projects A, B and C, and you want to place them all on a single board. So you just export each of them individually into a .zip with gerber files inside. Then you merge the gerbers and voila.
However, merging gerbers is a pretty nasty business. Firstly, there are not many tools for this – GerberPanelizer being the only solid one I found. However, just making it run is complicated. And even if you figure that out, the result it produces is not compatible with most fab houses.
So I do it differently – I merge the board files in Eagle itself. This isn’t nearly as convenient as merging Gerbers, but well, it works reliably and gives you a lot of customizability. It brings problems of its own, though – when you have a board open and copy another board into it, Eagle automatically renumbers parts in the newly copied board to prevent duplicates. While you can certainly live with that, it makes populating the boards afterwards a nightmare, since part numbers are not consistent with the original schematic. This is where an Eagle function called panelize comes in handy. Actually, a lot of people don’t know about this function and there isn’t much awareness about it on the internet, so that’s why I decided to write this article.
What panelize does is that it transfers all the labels with part numbers to a new layer, which isn’t affected by the renumbering mechanism.
Here’s my whole workflow:
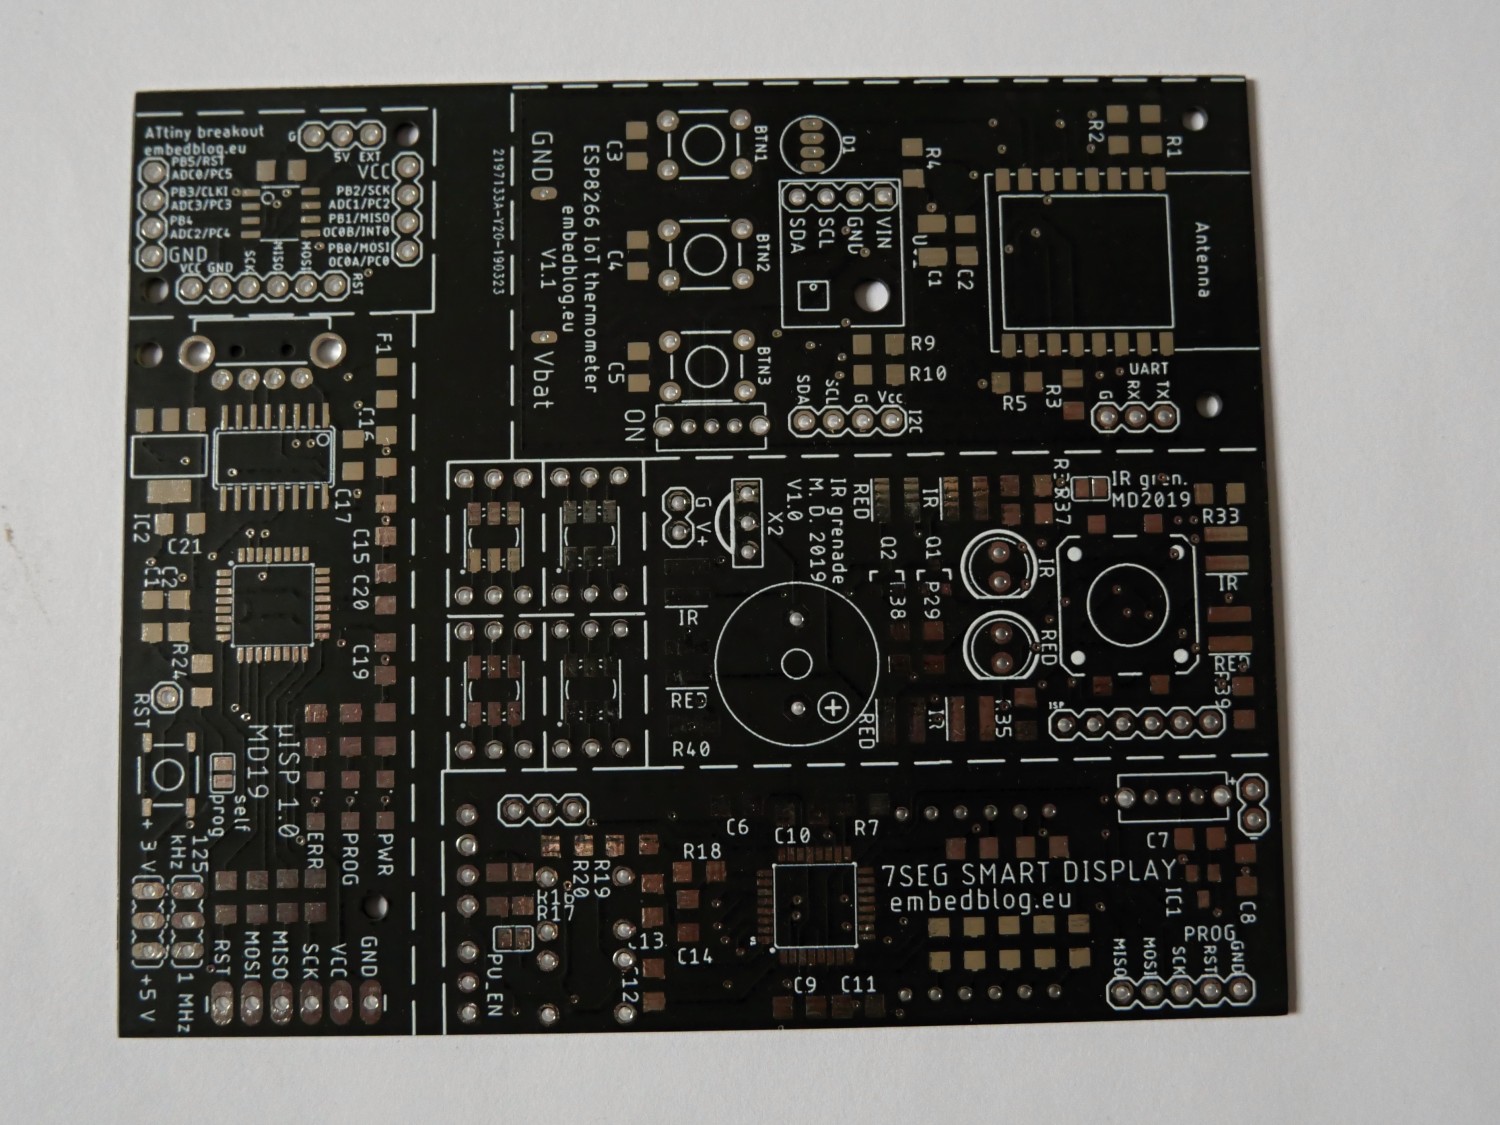
- I make a new folder (usually called “manufacture”) in Eagle projects directory and I copy all the brd files I want to have on the final PCB into it. Let’s say I copied A.brd, B.brd and C.brd.
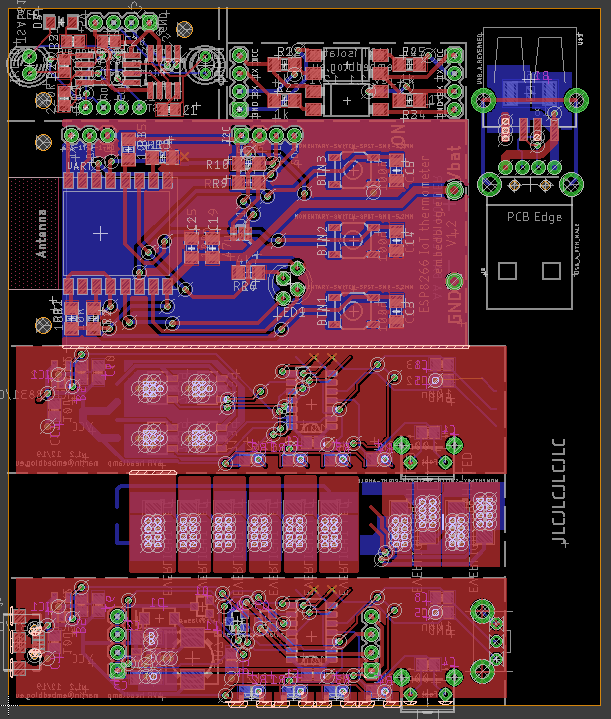
- I open two instances of Eagle. In the first one, I open A.brd, click on Tools -> Panelize -> Execute. Next, I increase the dimension outline to 100×100 mm (or the max size of the final board) and also I turn on all layers. I draw a long-dashed line around the board outline (where the dimension layer used to be) on layer tPlace. I will later cut out the board using this line.
- In the second instance of Eagle, I open B.brd. I turn on all layers except dimension and then click Tools -> Panelize -> Execute. I select the whole board by using Ctrl + A and click Copy.
- I switch back to the first instance of Eagle (with A.brd open) and click paste. The board B appears, and I position it in a suitable spot. I draw another long-dashed line around its outline.
- I repeat steps 3 and 4 with C.brd (you can also paste multiple instances of the same board). The long-dashed lines will help me cut out the boards when they arrive.
- Finally, I export A.brd (with B and C placed in it as well) using the built-in CAM processor (with the preset template_2_layer.cam). The only change you need to delete layer 25 (tNames) from silkscreen top and add layer 125 (_tNames), which is the layer with your part names/numbers. Repeat this for silkscreen bottom with respective layers. I actually saved this as a template for the CAM processor, since I use it so often.
And you are done! Now you have a single Gerber file, ready to be ordered from sites like JLCPCB or similar for 2 USD. Some fab houses will do a free V-score on the dashed lines if you tell them to do so in a comment, but most charge for it, so I just leave a comment to make the board as a single piece.
Drawbacks
The biggest drawback is that you need all your text labels, which aren’t part numbers, on layer tPlace, not tNames (which you should already have). Also, moving with the boards is not as convenient as I’d like, but as I said before, this method works really reliably, you don’t need any extra software of plugins and so far I had no problems with any fab house refusing the output (which cannot be said for the GerberPanelizer).
Sidenote: Cutting PCBs
This is a thing about which I’ve been thinking a long time, trying to find an optimal solution. One option is to score the PCB with a sharp knife (using a metal ruler and multiple knife passes) and then breaking the board on a sharp edge. In my experience, this works acceptably for PCBs with a thickness of 0.8 mm and less. Thicker boards will sometimes break in the wrong spot.
Another option is to use tin snips (this is what I do most of the time). This works relatively well except the resulting edge needs a lot of sanding and you have a limited reach (for example, cutting 100 mm board with my tin snips is really tricky). And it sometimes slightly bends the board.
None of the options above are really optimal, so I am currently constructing a PCB cutting machine, which I hope to finish soon and publish an article here.
I cut my pcb’s with a circular saw – Proxxon ks 230. Pcb have sharp edges, although some practise is required to cut the pcb edges straight. One can cut even the thicker pcb boards with pretty good speed.
Hi,
thanks for the tip! I looked up the device on the internet and it isn’t that expensive, so now I am considering buying it, instead of fiddling with some creation of my own…
You welcome. You should also buy Tungsten tipped blade 50mm Ø x 1.1mm (10mm bore) 20 teeth – its better than the generic blade that comes with the saw.